A well-designed PowerPoint template can elevate your presentations, ensuring consistency, professionalism, and visual appeal. Whether you’re creating a template for personal use, business presentations, or branding purposes, starting from scratch gives you full creative control over the look and feel of your slides.
In this guide, we’ll walk you through the step-by-step process of designing stunning PowerPoint templates that not only look great but also enhance audience engagement.
Define the Purpose and Audience
Before you start designing, ask yourself: ✅ Who will use this template? ✅ What type of content will it showcase? ✅ Should it align with a specific brand or theme?
A business template, for instance, should be clean and professional, while a creative one can be more vibrant and dynamic.
Set Up Slide Master for Consistency
The Slide Master is the foundation of your PowerPoint template. It allows you to define layouts, fonts, colors, and placeholders that apply across all slides.

slidemaster
How to Access Slide Master:
1️⃣ Open PowerPoint and go to View > Slide Master. 2️⃣ Edit the topmost slide to set global styles for fonts, colors, and backgrounds. 3️⃣ Customize individual layout slides for titles, bullet points, images, and other elements.
📌 Pro Tip: Keep multiple slide layouts ready so users can choose the most suitable design for different content types.
Choose a Cohesive Color Scheme
Colors set the tone of your presentation. A well-thought-out color scheme ensures consistency and enhances readability.
🎨 Stick to 2-3 primary colors that complement each other. 🎨 Ensure high contrast between text and background. 🎨 Use brand colors if the template is for corporate use.
🔹 You can create a custom color theme by navigating to Design > Colors > Customize Colors.
Select Professional and Readable Fonts

Font choice plays a crucial role in how your message is perceived. Readability and professionalism should be your top priorities.
Font Guidelines:
✅ Use sans-serif fonts like Arial, Montserrat, or Calibri for modern, clean designs. ✅ Pair fonts wisely—one for headings and one for body text. ✅ Ensure your text is legible even from a distance (minimum 24pt for body text).
🔹 Set your chosen fonts by going to Design > Fonts > Customize Fonts.
Design a Clean and Engaging Background
A good background complements content without overpowering it. Avoid busy or overly bright backgrounds.
How to Add a Custom Background:
1️⃣ Go to Slide Master and select a layout. 2️⃣ Click Background Styles > Format Background. 3️⃣ Choose a solid color, gradient, image, or pattern that enhances readability.
📌 Pro Tip: Subtle gradients or light textures work well without distracting from the content.
Create Custom Slide Layouts
Templates should offer flexibility. Provide multiple slide layouts for different content types: ✅ Title Slide – Bold and impactful. ✅ Content Slide – Space for text, bullet points, and images. ✅ Comparison Slide – Two or more sections for easy comparison. ✅ Image-Only Slide – For showcasing visuals. ✅ Chart/Graph Slide – Ideal for data visualization.
🔹 To create new layouts, go to Slide Master > Insert Layout and design them as needed.
Add Placeholder Elements for Easy Customization

free powerpoint templates
Placeholders make it easy for users to insert text, images, and other content without disrupting the design.
How to Add Placeholders:
1️⃣ In Slide Master, select a layout. 2️⃣ Click Insert Placeholder and choose Text, Picture, Chart, or Table. 3️⃣ Resize and position placeholders for a clean look.
📌 Pro Tip: Keep ample white space for a clutter-free slide layout.
Incorporate Engaging Visual Elements
Use icons, shapes, and infographics to enhance slides without overloading them.
Best Practices for Visuals:
🎯 Use icons instead of bullet points to make slides visually appealing. 🎯 Ensure images are high-resolution and relevant. 🎯 Use PowerPoint’s built-in SmartArt for structured diagrams.
🔹 Insert icons via Insert > Icons and select from PowerPoint’s free library.
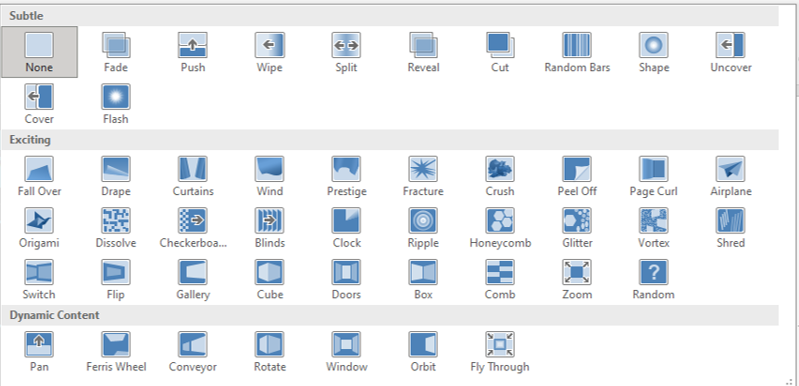
Apply Subtle Animations and Transitions

transition
While animations can make slides more dynamic, overuse can be distracting.
How to Add Animations:
🎬 Select an object, go to Animations, and choose a subtle effect (e.g., Fade, Appear). 🎬 Keep transitions simple with Fade or Push instead of flashy effects. 🎬 Apply animations consistently to maintain a professional look.
📌 Pro Tip: Limit animations to key elements to maintain focus.
Save and Share Your PowerPoint Template
Once your template is finalized, save it in the correct format for easy reuse.
How to Save as a PowerPoint Template (.POTX):
1️⃣ Click File > Save As. 2️⃣ Choose PowerPoint Template (.POTX) from the file type list. 3️⃣ Save it in the Custom Office Templates folder for easy access.
Now, you can apply this template to any new presentation while maintaining a polished and consistent design!
Final Thoughts
Creating a PowerPoint template from scratch allows you to craft a professional, visually appealing, and user-friendly design tailored to your needs. By focusing on consistency, readability, and engaging visuals, you can develop a template that enhances your presentations effortlessly.
🚀 Now it’s your turn! Try designing your own template and see the difference it makes.
Read more blog here:


