

Videos can turn an ordinary PowerPoint presentation into something truly captivating. Whether it’s a quick tutorial, product demo, or motivational clip, integrating videos adds energy, emotion, and engagement to your slides.
But here’s the secret: you don’t need advanced video editing software. PowerPoint’s built-in video tools let you trim, crop, fade, adjust playback, and even add effects — all without leaving your presentation.
In this guide, we’ll explore how to edit and control videos in PowerPoint like a pro, so your slides look and sound seamless every time.
🎬 Why Use Videos in PowerPoint?
Videos do more than just decorate slides — they enhance understanding and storytelling. Here’s why you should use them:
- Visual storytelling: Show processes or case studies instead of explaining with text.
- Better engagement: Moving visuals keep your audience focused longer.
- Professional polish: Videos make your presentation feel modern and dynamic.
- Simplify complex ideas: Demonstrations are easier to understand than static text.
For best results, use short, relevant, and high-quality videos that support your key points.
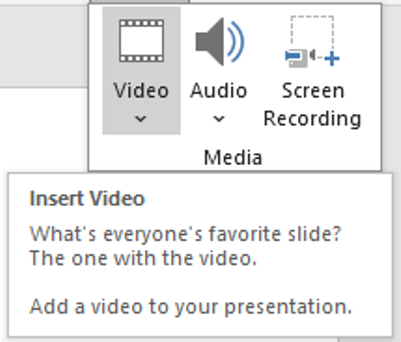
🎥 Step 1: Inserting a Video in PowerPoint
Adding a video is simple and takes just a few clicks:
- Go to the Insert tab on the Ribbon.
- Click on Video → This Device (to upload from your computer).
- Choose the video file (PowerPoint supports formats like MP4, MOV, and WMV).
- Once inserted, a video frame appears on your slide.
💡 Tip: You can also insert Online Videos via Insert → Video → Online Video, then paste a YouTube link or other embed URL.
✂️ Step 2: Trimming a Video Clip
Don’t want to play the entire video? PowerPoint allows you to trim it directly:
- Select the video on your slide.
- Click on the Playback tab → Trim Video.
- In the popup window, drag the green handle (start point) and red handle (end point).
- Preview, then hit OK.
This keeps your presentation focused while saving time during playback.

🎚 Step 3: Adjusting Video Playback Options
PowerPoint gives full control over how and when your video plays.
Under Playback (Video Tools), you can customize:
- Start Automatically: Video begins playing as soon as the slide appears.
- Start On Click: Plays when you click the video.
- Play Full Screen: Expands your video to fill the screen during the presentation.
- Loop Until Stopped: Useful for background clips or motion visuals.
- Hide While Not Playing: Keeps slides clean when the video isn’t running.
🎯 Pro Tip: For smooth transitions, use “Start Automatically” for background clips and “On Click” for attention-grabbing videos.

🌈 Step 4: Formatting the Video Frame
Just like images, videos can be styled to match your slide’s design.
Under Format → Video Styles, you can:
- Add borders or shadows
- Apply video shapes (rounded, oval, etc.)
- Adjust brightness and contrast
- Apply quick styles like reflections or soft edges
These subtle tweaks help your videos blend perfectly with your slide theme.
🔄 Step 5: Adding Fade Effects and Bookmarks
You can make video transitions smoother with fade effects.
Go to Playback → Fade In / Fade Out, and add 1–3 seconds of fade for a professional finish.
📍 Bonus Tip – Add Bookmarks:
Bookmarks let you jump to specific moments in a video or trigger animations at precise times.
- Play the video, pause at the desired frame.
- Click Add Bookmark in the Playback tab.
- You can now link animations or actions to this bookmark.
This is excellent for narrated lessons or product tutorials.
🎛 Step 6: Compressing and Optimizing Video Files
Large videos can slow down your presentation or make file sharing difficult.
PowerPoint has a built-in solution:
- Go to File → Info → Compress Media
- Choose the quality level (Presentation, Internet, or Low Quality)
This reduces file size while keeping your video clear and playback smooth.
🎨 Step 7: Combine Videos with Professional Slides
While PowerPoint’s video tools are powerful, great design is what makes everything shine.
Enhance your videos with modern slide layouts, icons, and infographics to tell your story visually.
Check out SlideMasterz Premium PowerPoint Templates — designed for corporate, educational, and creative needs.
Each template is fully customizable, animation-ready, and video-friendly — perfect for professional presentations.
If you’re just starting, try our free PowerPoint templates and explore creative possibilities instantly.
🔗 Related Blogs to Level Up Your Skills
Continue your learning journey with these PowerPoint tutorials from SlideMasterz:
- PowerPoint Backgrounds: How to Choose and Customize Them
- Working with Icons in PowerPoint: Simple Tricks for Better Visuals
Each guide helps you master a different PowerPoint tool — building toward truly professional presentations.
✅ Final Thoughts
PowerPoint’s video tools open up endless creative possibilities. With just a few clicks, you can trim, style, and control playback — no editing software needed.
Whether you’re adding a promotional clip, a tutorial, or a cinematic intro, videos can make your slides more memorable and professional.
So next time you prepare a deck, don’t hesitate to hit Insert → Video and bring your ideas to life!


