

Tables are one of the most effective ways to present structured data in PowerPoint. Whether you’re showing sales figures, project timelines, or survey results, a well-designed table can make complex information easy to understand. The problem is, most presenters use default tables — which often look plain, cluttered, or hard to read.
In this guide, we’ll explore how to create, format, and design PowerPoint tables like a pro. By the end, you’ll know how to turn simple grids into polished visuals that enhance your presentation.
Why Use Tables in PowerPoint?
Tables provide a clean, organized way to show data without overwhelming your audience. Instead of dumping numbers onto slides, tables:
- Simplify comparison – Rows and columns make it easy to spot differences.
- Save time – Present more data in less space.
- Improve readability – Organized layouts guide the viewer’s eye.
- Support storytelling – Tables can highlight key trends or outcomes.
When done right, tables can be as powerful as charts. For chart design tips, see our blog on Mastering Data Visualization in PowerPoint.
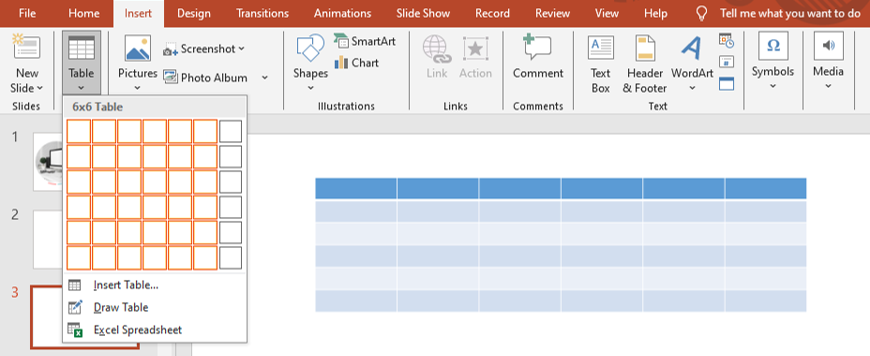
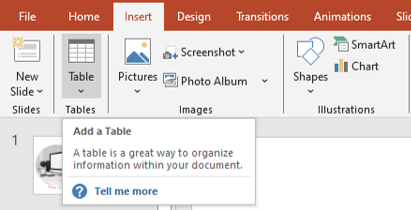
How to Insert a Table in PowerPoint
- Go to the Insert tab.
- Click Table and select the number of rows and columns.
- A default table will appear on your slide.
- Enter your data directly into the cells.
That’s it! Now comes the most important part: formatting.
Formatting PowerPoint Tables for Better Design
A table is only useful if your audience can read it easily. Here are key formatting tips:
- Use Consistent Fonts
Stick to your presentation’s theme fonts. Avoid mixing typefaces within a table. For more on font selection, check our blog on Typography in PowerPoint.
- Align Text Properly
- Numbers should be right-aligned for easy comparison.
- Text should be left-aligned for readability.
- Headings should be centered to stand out.
- Adjust Cell Spacing and Padding
Use the Cell Margins option to give your content breathing room. Tight text crammed into cells looks messy.
- Apply Table Styles
Go to Table Design tab > Table Styles. PowerPoint offers built-in designs, but customize them for brand consistency.
- Highlight Key Rows or Columns
Use shading or bold text to emphasize totals, deadlines, or critical data.
Design Tips to Make Tables Stand Out
Beyond basic formatting, here’s how to make tables more visually engaging:
- Limit Data per Slide: Don’t overload with too many rows/columns. Break large tables across multiple slides.
- Use Color Sparingly: Apply brand colors to headers or highlight rows, but avoid rainbow tables.
- Add Icons or Shapes: Visual cues like arrows or checkmarks make comparisons clearer. Learn more in our blog on Using Icons in PowerPoint.
- Convert to SmartArt or Charts: If your table is too complex, consider turning it into a graphic for better impact.
Free Templates to Practice Table Design
Want to try these tips with ready-made slides? Download our Free PowerPoint Templates.
These free resources include clean, professional layouts where you can experiment with tables, fonts, and colors without starting from scratch.
Premium Templates for Professionals
If you need presentation-ready designs that save time, explore our Premium PowerPoint Templates.
They include:
- Professionally formatted tables.
- Built-in color schemes aligned with business needs.
- Fully customizable slides for data-heavy presentations.
With these, you can focus on the story while your slides take care of the design.
Common Mistakes to Avoid
- Too Much Data: Don’t turn your table into an Excel spreadsheet on a slide.
- Small Fonts: Always ensure text is readable from the back of a room.
- Inconsistent Borders: Uneven or dark borders make tables look messy.
- Overuse of Colors: Too many highlights distract instead of emphasize.
Final Thoughts
PowerPoint tables are more than just grids — they’re storytelling tools. When formatted well, they allow your audience to quickly grasp key insights, trends, and comparisons.
By mastering alignment, spacing, color, and emphasis, you can transform plain tables into professional visuals that elevate your message.
Start small by practicing with our free templates, and when you’re ready to create polished, client-ready decks, upgrade to our premium templates for effortless results.
For another fundamental design skill, check out our guide on Working with Images in PowerPoint.


