

Adding movement to your slides can transform a static presentation into an engaging, dynamic experience. One of the most effective and easy ways to do this in PowerPoint is by animating shapes. Whether you’re highlighting key points, guiding your audience’s attention, or just adding some creative flair, animations bring your content to life.
In this blog, we’ll explore how to animate shapes in PowerPoint to make your slides more interactive and memorable.
Why Animate Shapes in PowerPoint?
Animations can:
- Emphasize important elements
- Simplify complex content by introducing visuals gradually
- Maintain audience attention
- Create a more professional and polished presentation
Animations also help you maintain visual rhythm throughout your slide deck—especially useful in infographics or educational presentations. If you’re using PowerPoint shapes to build infographics, shape animations can add a storytelling layer to your data.
Getting Started with Shape Animations
- Insert a Shape
Go to Insert > Shapes and select any shape you’d like to animate (circle, rectangle, arrow, etc.). Place it on your slide where you want the animation to begin.
- Add an Animation
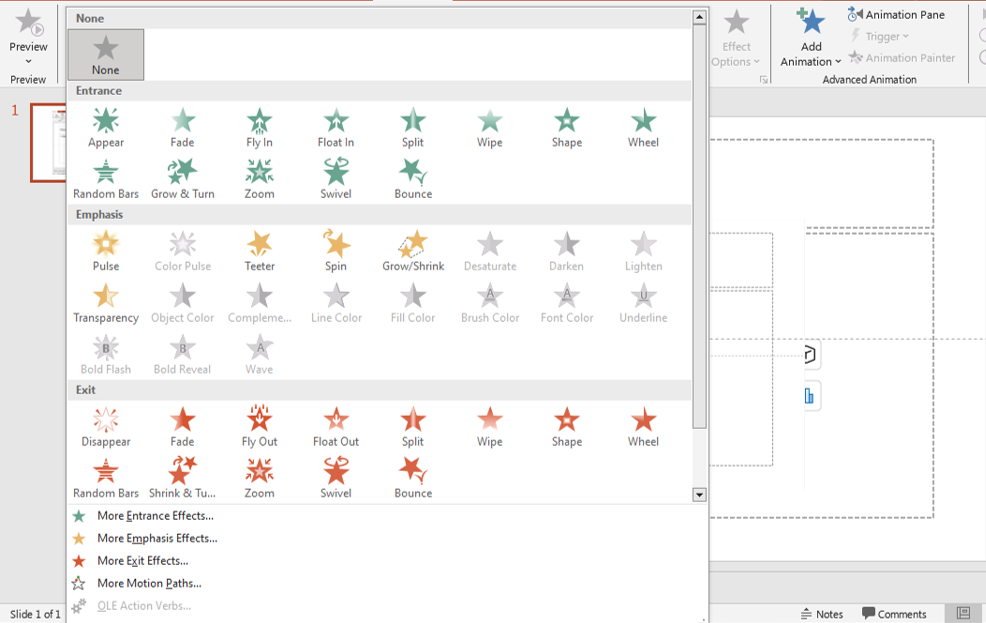
- Start by selecting the shape you want to animate.
- Then, go to the Animations tab in the ribbon.
- From there, pick an effect—whether it’s an Entrance, Emphasis, Exit, or a Motion Path.
animations
Some popular options:
- Fade In for subtle entrances
- Zoom to draw attention
- Spin for a creative twist
- Fly In to simulate motion
Customizing the Animation

animations
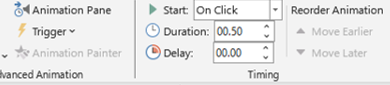
Use the Animation Pane
This tool gives you full control over:
- Order of animations
- Timing and duration
- Start triggers (On Click, With Previous, After Previous)
Access it via Animations > Animation Pane.
Adjust Timing
- Use Duration to control how long the animation lasts.
- You can also add a Delay to stagger animations and improve pacing.
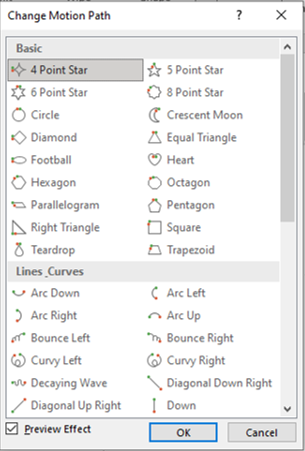
Add Motion Paths
Motion Paths allow you to move shapes along a custom route.
- Go to Animations > Add Animation > Motion Paths
- Select a preset (Line, Arc, Turn) or draw your own
You can combine motion with other effects for layered animation.
Pro Tips for Using Shape Animations
- ✅ Keep it simple: Don’t overload your slides with too many animations
- ✅ Be consistent: Use a limited set of animations for a cohesive feel
- ✅ Focus on clarity: Use movement to support your message, not distract from it
- ✅ Test playback: Always preview to ensure timing and flow are just right
If you’re working with templates, consider applying animations to Master Slides to maintain consistency. You can explore pre-animated templates in our free PowerPoint template collection.
Creative Ways to Animate Shapes
- Step-by-step infographics: Animate each step individually
- Interactive diagrams: Reveal components with animations
- Data highlights: Emphasize statistics with shape transitions
- Narrative builds: Unfold shapes to visually tell a story
You can also use animations to enhance interactive presentations or quizzes—shapes can appear as visual feedback for correct/incorrect answers.
Final Thoughts
Animating shapes in PowerPoint is a simple yet impactful way to energize your slides and captivate your audience. With just a few clicks, you can turn ordinary content into a lively, engaging visual experience.
🎉 Try experimenting with animations on your next slide deck and watch your presentations pop!
Want more PowerPoint shape tricks? Don’t miss our blog on how to crop images into shapes using Shape Masks and designing custom icons using PowerPoint shapes to take your visuals to the next level.


