

Images can make or break your PowerPoint presentation. Used effectively, they add clarity, emotion, and impact. Misused, they can confuse your audience or make your slides look cluttered and unprofessional. This blog post will walk you through the essential steps and tools for inserting and working with images in PowerPoint, especially if you’re just starting out.
Choosing the right image is just as important as placing it correctly. Always ensure that your images are high resolution and relevant to your topic. If you’re creating a professional business presentation, opt for clean, high-quality stock images rather than casual smartphone photos. You can explore royalty-free image sites or integrate professional visuals with SlideMasterz PowerPoint templates (free downloads here) that already have dedicated spaces for impactful images.
1. Inserting Images into Your Slide
To insert an image in PowerPoint: – Go to the Insert tab on the ribbon. – Click on Pictures and choose This Device to upload from your computer, or Online Pictures to search via Bing. – Select the image you want and click Insert.
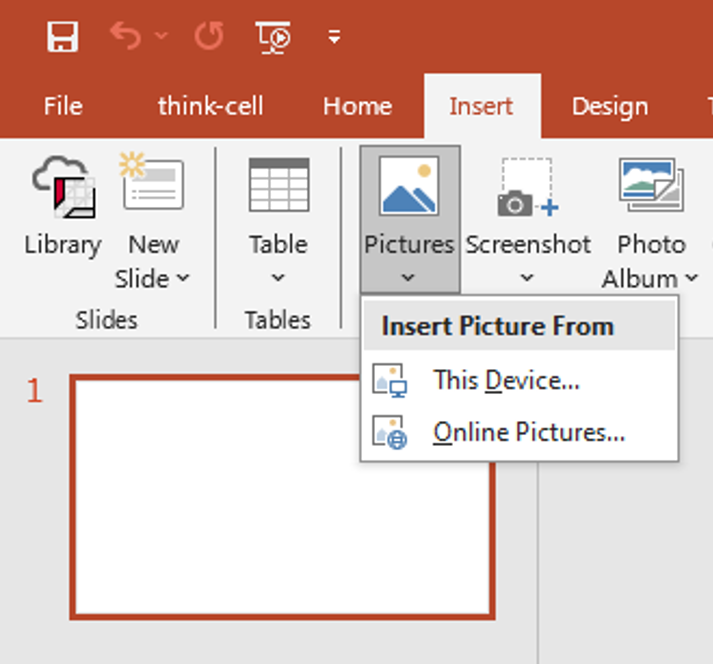
insert pic
You can also drag and drop an image directly onto a slide from your computer.
For faster workflow, PowerPoint also allows you to paste images directly from the clipboard. If you are copying visuals from another document or a browser, simply Ctrl + C to copy and Ctrl + V to paste. This is particularly handy when you need quick prototypes for slide concepts before finalizing your presentation design.
2. Resizing and Positioning Images
After inserting an image: – Drag the corner handles to resize proportionally. – Use the side handles to stretch or compress the image (not recommended for professional use). – Move the image by clicking and dragging it to the desired location.
Tip: Hold Shift while dragging to maintain aspect ratio.
If you’re preparing slides for large screens, always preview them in Slideshow mode to check the image size in real viewing conditions. A picture that looks fine in the editor may appear too small or too large when projected. Align your visuals with other elements to maintain a clean, balanced composition.
3. Cropping Images
To crop an image: – Select the image. – Go to Picture Format > Crop. – Drag the black crop handles inward to trim parts of the image.
You can also use Crop to Shape if you want to crop your image into circles, arrows, stars, or other shapes.
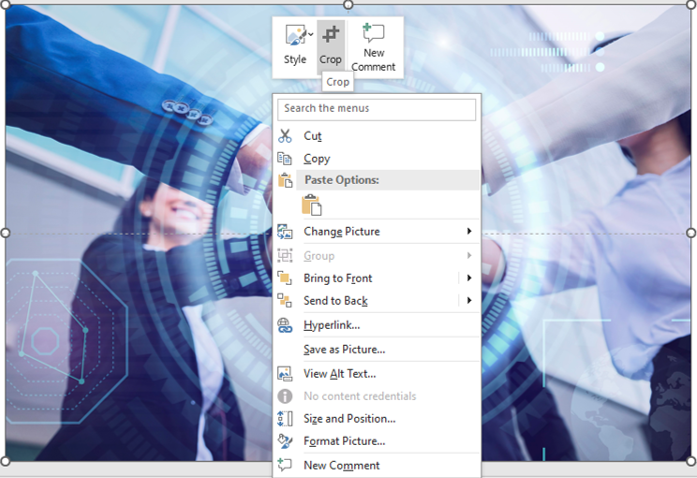
crop
Creative cropping can make your presentation more dynamic. For example, you can crop product images into rounded shapes for a softer look or use angled crops for a modern, edgy design. This is especially effective when paired with SlideMasterz’s professionally designed placeholder templates that maintain perfect alignment.
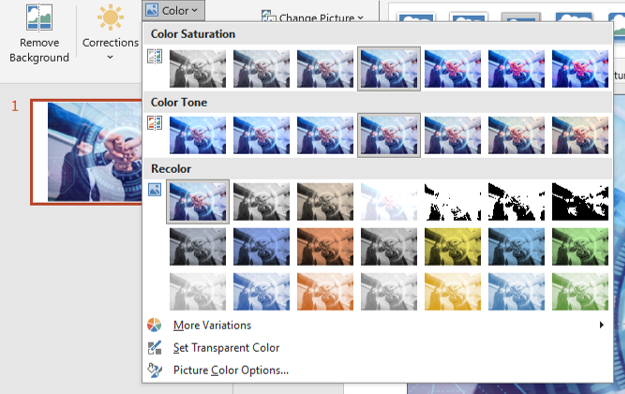
4. Applying Picture Styles and Effects
PowerPoint offers built-in styles to give your images a polished look: – Select the image, then go to Picture Format. – Choose from various Picture Styles, like shadows, reflections, or soft edges. – Use Artistic Effects to make your image look like a sketch, painting, or blur it for background use. While these effects can enhance visuals, use them sparingly to avoid distracting from your main message. Overuse of filters can make slides appear cluttered or unprofessional. Stick to subtle enhancements that complement your brand identity and maintain a consistent style throughout your presentation.
5. Using Image Transparency
If you want to create layered effects: – Select the image. – Go to Picture Format > Transparency. – Choose a preset or select Picture Transparency Options to adjust manually.
This is useful when placing text over images or creating soft backgrounds. Transparency is also a powerful branding tool.
For example, a semi-transparent company logo can be placed in the background of each slide for subtle branding without overpowering the content. This technique is widely used in corporate decks and works perfectly with SlideMasterz’s branded templates.
6. Aligning and Layering Images
To keep your slides neat: – Use the Align tool (under Picture Format > Align) to center or evenly distribute multiple images. – Use Bring Forward or Send Backward to control the order of overlapping elements.
For complex layouts with multiple images, grouping them together (Ctrl + G) can save time and keep spacing consistent. This is especially useful for creating side-by-side comparisons, product galleries, or team introductions where symmetry matters.
7. Compressing Images for File Size
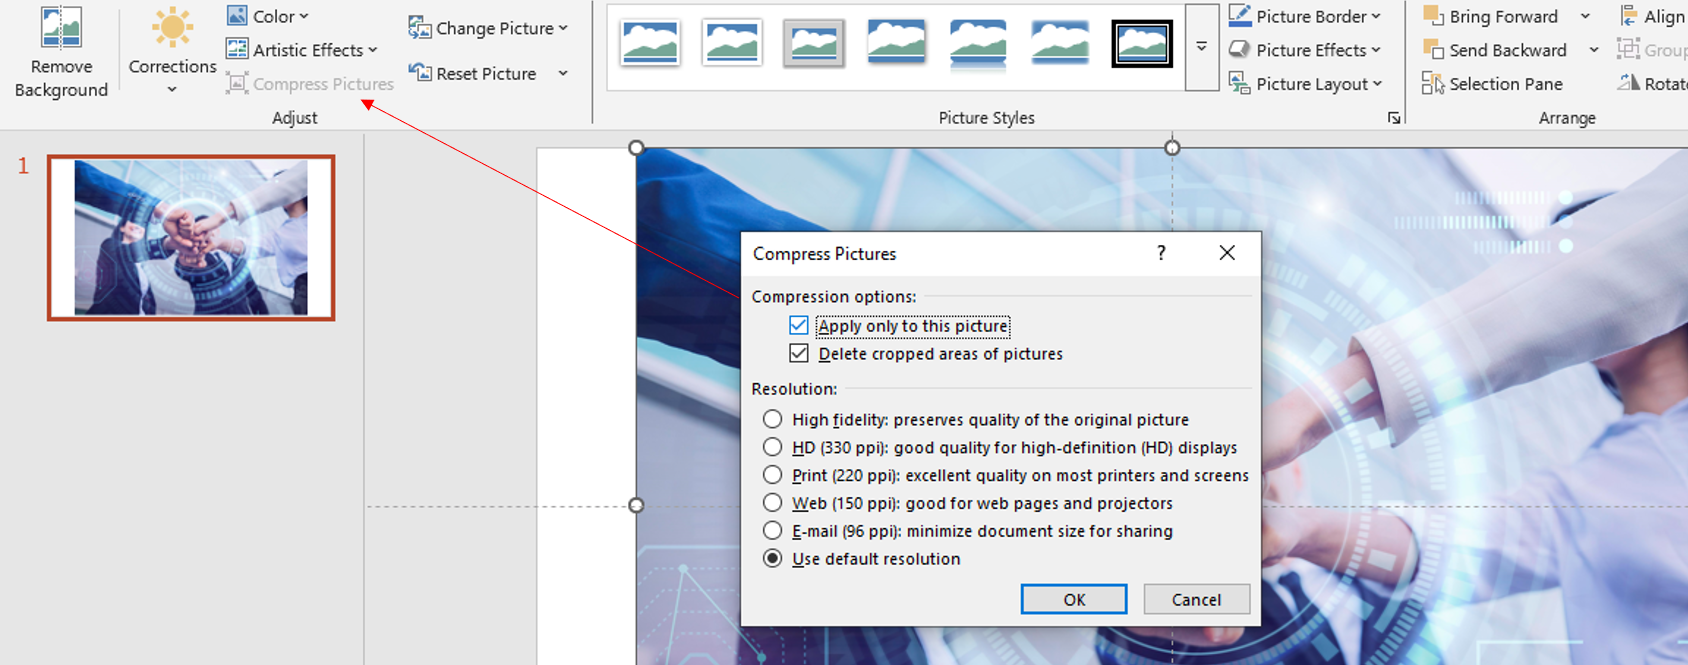
To keep your presentation light: – Click on any image. – Go to Picture Format > Compress Pictures. – Choose the resolution based on your needs (e.g., Web or Email) and decide if you want to apply changes to all images. File size is critical if you plan to email or upload your presentation. Overly large files may be blocked by email servers or take too long to load during virtual meetings. Compress images before finalizing your presentation to ensure smooth sharing without sacrificing too much quality.
8. Bonus Tip: Use PowerPoint Templates with Image Placeholders
A faster way to manage image placement is to use PowerPoint templates that already include image placeholders. At SlideMasterz, we offer a variety of free PowerPoint templates you can download and customize. These placeholders are designed to maintain visual balance, so even if you change images frequently, your slides will still look professional.
Conclusion
Learning how to use images effectively in PowerPoint can drastically improve the quality of your presentations. Start with the basics above and practice using each feature to build your skills.
Looking to expand your PowerPoint skills? Read more from our blog:
– Formatting Text in PowerPoint
– Using Slide Master for Consistency
– The Do’s and Don’ts of Animations
If you want to save time while achieving professional-quality slides, start using SlideMasterz templates that already integrate smart image placement, typography, and branding. These resources ensure that your presentations are engaging, visually balanced, and ready for professional use.
Need ready-to-use designs? Visit our Free Templates Page and start creating engaging presentations today!


