
")
When it comes to making impactful PowerPoint presentations, pictures are far more than decoration. They can capture attention, enhance understanding, and boost emotional connection. However, using them incorrectly can do more harm than good. In this guide, you’ll learn how to use pictures effectively in PowerPoint to create presentations that stand out.
At SlideMasterz, we’ve seen countless presentations transformed simply by using the right visuals. A well-placed image can guide the audience’s eye, set the tone of your message, and make your content far more memorable. Whether you’re a student preparing a class project or a business professional crafting a pitch deck, these image tips will help you communicate with greater impact.
1. Use High-Quality Images Only
Always use sharp, high-resolution images. Pixelated or blurry pictures instantly reduce your presentation’s credibility. Websites like Unsplash and Pexels offer free, high-quality images that can be used for commercial purposes.
Tip: Avoid overused stock photos with unnatural poses. Go for authenticity. A good test is to view your slide in slideshow mode on a large screen. If the image loses sharpness or looks grainy, replace it before presenting. Also, remember that image quality directly affects your audience’s trust in your content—clean, high-res photos subtly communicate professionalism. For ready-made templates with optimized image placeholders, explore our Free PowerPoint Templates.

Powerpoint Services
2. Keep Relevance at the Core
Don’t just add a picture because it looks good. Make sure it supports your message. For example, if you’re giving a presentation on business growth, a graph image or team photo in action adds more value than a random skyline shot. Think of every image as a storytelling tool. Ask yourself: Does this image move my audience closer to understanding my point? If the answer is no, leave it out.
3. Consistent Style Matters
Stick to a consistent photo style throughout your presentation. Whether it’s colorful, monochrome, or with a particular filter, consistency helps make your slides feel cohesive.
Learn more: Minimalist vs. Bold: Which PowerPoint Design Style Works Best?
Mixing multiple photo styles—like combining vintage filters with hyper-saturated images—can make your presentation look unpolished. If you use stock images, consider editing them slightly in PowerPoint or a tool like Canva to match your theme’s tone. Consistency isn’t just visual; it reinforces your brand identity.
4. Use the Right Image Layouts
Instead of dropping an image at random, align it with your layout. PowerPoint provides built-in layout options or you can use the “Grid and Guides” to ensure perfect spacing.
Centering or aligning images with your text creates balance on your slides, making them easier to follow. Templates with pre-defined layouts can save you time while ensuring professional alignment—our PowerPoint Templates Collection has dozens of such options ready to customize.
crop
5. Add Captions for Clarity
Sometimes images speak for themselves, but often they benefit from a brief caption. This provides context and helps the viewer understand why it’s relevant. Captions can also be used to highlight key data or facts directly on the slide, reducing the need for your audience to read additional bullet points. Keep captions concise—ideally one sentence—to maintain visual balance.
6. Avoid Cluttered Slides
Don’t overload a single slide with too many images. It can overwhelm your audience. Stick to 1-2 images per slide and balance them with white space.
Explore: How to Make Your PowerPoint Slides More Engaging
Remember, white space is your friend. It gives breathing room to your design, helping important elements stand out. If you must use multiple images, consider grouping them into a single collage-style frame to keep your slide organized.
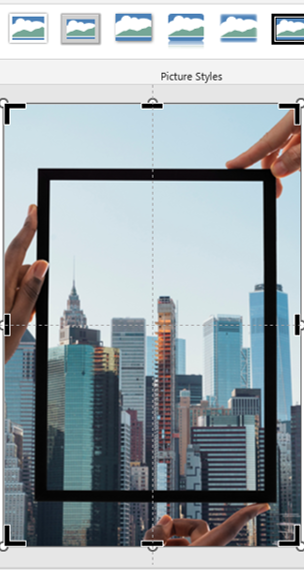
7. Utilize Crop and Mask Tools
PowerPoint’s built-in cropping and shape masking tools help you make images fit perfectly. You can crop images into circles, arrows, or custom shapes to match your theme.
Learn how: Shape Masks: How to Crop Images into Custom Shapes in PowerPoint
Creative cropping can add a subtle design element without extra graphics. For example, circular-cropped images can give your slides a clean, modern feel, while diagonal crops can add a sense of movement.
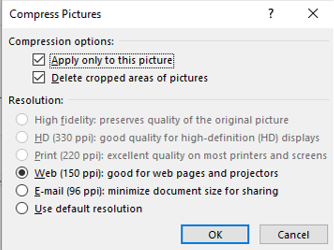
8. Compress Images for Faster Loading
Large file sizes can slow down your presentation. Use PowerPoint’s image compression feature to reduce file size without noticeable loss in quality.
How to Compress: – Select the image – Go to the “Picture Format” tab – Click “Compress Pictures”
A smaller file size also makes your presentation easier to share via email or cloud storage. This is especially useful if you’re collaborating remotely or presenting over a webinar platform where speed matters.
9. Maintain Proper Contrast
If you place text over an image, make sure it’s readable. Use image overlays (semi-transparent layers) or contrast filters to improve text visibility. The quickest fix for low contrast is to add a dark or light gradient behind your text area. This technique ensures your message is legible without covering too much of the image.
10. Use PowerPoint Design Ideas (AI Feature)
PowerPoint’s “Design Ideas” tool can automatically suggest the best image placements based on your content. It’s a quick way to get a polished look.
Bonus Resource: Want done-for-you templates that include image placeholders, sleek design, and full customization? Check out our Free PowerPoint Templates to get started instantly. While AI design suggestions are helpful, always review them to ensure they match your presentation’s tone and message. Automated layouts save time, but personal touches make them uniquely yours.
Final Thoughts
Using images effectively in PowerPoint is a skill that blends creativity with strategy. The goal is to enhance your message, not distract from it. With the tips above, you can elevate your next presentation from ordinary to visually stunning.
Liked this blog? You might also enjoy:
– The Ultimate Guide to Using Images and Icons in PowerPoint
– Mastering PowerPoint Presenter View: Tips for Seamless Presentations
– Creating Infographics with PowerPoint Shapes


