

Think you know PowerPoint? Think again. Most users barely scratch the surface of what this presentation software can really do. Whether you’re a student, a startup founder, or a seasoned corporate presenter, mastering a few hidden PowerPoint features can instantly elevate your slides from average to unforgettable.
In this post, we’re uncovering 10 surprising PowerPoint tricks that will save you time, improve your design, and keep your audience hooked—all while linking to free templates you can use right away. At SlideMasterz, we’ve seen how just a handful of smart techniques can completely transform a presentation. These tricks aren’t just for designers—they’re for anyone who wants to make their slides look professional without spending hours tweaking them.
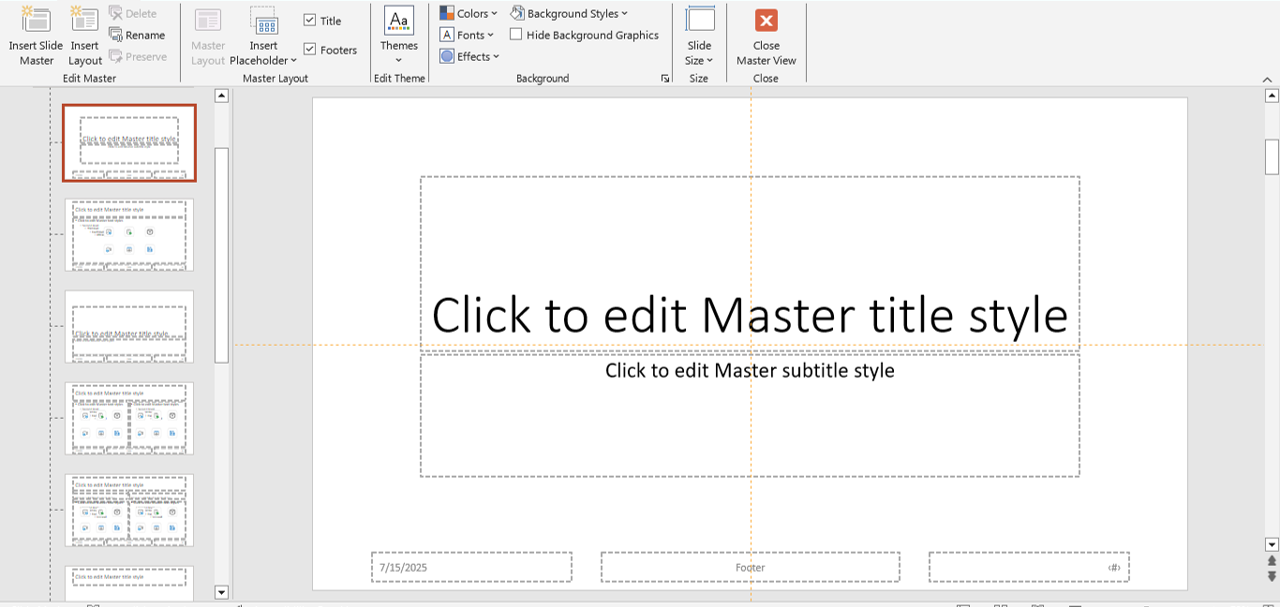
1. Use the Slide Master for Consistency
Instead of styling each slide individually, use the Slide Master to set universal fonts, colors, logos, and layouts. You’ll save hours on formatting. This is especially useful for company presentations where branding must stay consistent. By setting your brand’s typography, color codes, and logos in the Slide Master, you ensure every future slide deck matches your visual identity perfectly—no matter who’s creating it.
slidemaster
2. Align Objects Perfectly With the Selection Pane
Click on Home > Select > Selection Pane to see and rename objects on a slide. You can hide, reorder, and align layers like a pro—no more guessing. Renaming layers in the Selection Pane (e.g., “Chart – Sales Data” instead of “Rectangle 1”) also makes editing much faster later, especially for complex slides with multiple overlapping elements.
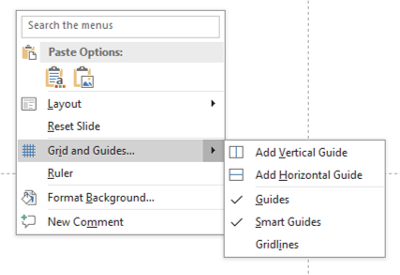
3. Design Like a Pro Using Gridlines and Guides
Under the View tab, enable Gridlines and Guides to help align text boxes and shapes with pixel precision. It gives your presentation a clean, structured look. Even slight misalignment can make a slide look unpolished. Using gridlines not only improves visual harmony but also speeds up your workflow—particularly when building slides with multiple charts or diagrams.
gridlines
4. Use Zoom for Interactive Navigation
Add interactive navigation using Zoom > Summary Zoom. Create clickable sections in one slide to move between topics like a website.
Perfect for pitch decks and business reports. 🧭 This trick works brilliantly for training modules or multi-topic presentations where you want to keep your audience engaged without endless scrolling through slides. It also works great for non-linear storytelling.
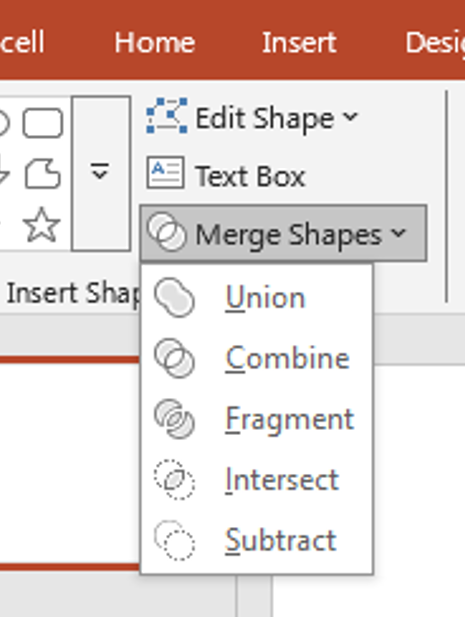
5.Merge Shapes for Custom Graphics
merge tool
Create your own icons and layouts by using Merge Shapes (under Shape Format > Merge Shapes). Combine, subtract, and intersect shapes to build anything.
✅ Use this with our infographic-ready templates to stand out visually. Instead of relying on generic clip art, this feature lets you make truly unique visuals that match your brand style. For example, you could merge shapes to create a custom flowchart icon, then reuse it across different decks.
6. Record Your Presentation with Narration
Use Slide Show > Record Slide Show to capture your voice and timings. Perfect for webinars, tutorials, or client proposals. This feature is also ideal for creating asynchronous presentations for remote teams. You can send a narrated deck to stakeholders in different time zones, saving meeting time while still delivering a clear, personal message.
7. Use Morph Transition for Smooth Animation
Instead of clunky entrance effects, use Morph to smoothly animate objects across slides. It’s cinematic and seamless.
Check out our blog on PowerPoint Morph tricks for advanced use cases. Morph is particularly effective for storytelling—turning a static slide deck into a visually dynamic experience. You can use it for animated infographics, product demos, or step-by-step explanations without creating separate animations for each movement.
8. Reuse Slides from Other Presentations Instantly
Go to Home > New Slide > Reuse Slides to import from another file without losing formatting. Great for saving time. This is a lifesaver when preparing multiple decks for different audiences. You can maintain consistent branding and design while customizing only the sections that need to change.
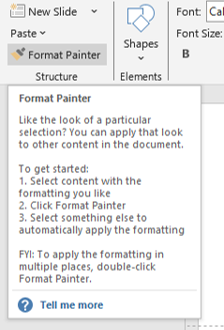
9. Copy Formatting with the Format Painter
format painter
Select a styled object, click Format Painter, and apply it to others. Works for text, shapes, and more. Instant consistency. Pro tip—double-click the Format Painter to apply the same style to multiple objects in one go without having to reselect it each time.
10. Use Designer to Instantly Upgrade Slide Layouts
Let PowerPoint suggest layout improvements with Designer. Just insert content and watch it offer sleek options instantly.
Pair this with our modern business templates for professional results. While Designer can’t replace thoughtful storytelling, it’s perfect for quick polish when you’re short on time. It works especially well when you have high-quality visuals ready but aren’t sure how to arrange them attractively.
Bonus: Download Free Templates Built with These Tricks
Why start from scratch? Use these techniques on our handcrafted, fully-editable PowerPoint templates—available for free:
All templates are designed to make the most of PowerPoint’s hidden features. From pre-built Morph animations to Slide Master branding, these files give you a head start so you can focus on your message instead of the formatting.
Final Thoughts
PowerPoint is more powerful than you think. These lesser-known features can save time, simplify your workflow, and create polished, professional presentations that leave a lasting impression.
💡 Which of these tricks surprised you the most? Try them out and let us know—and don’t forget to download your free templates to get started!


